
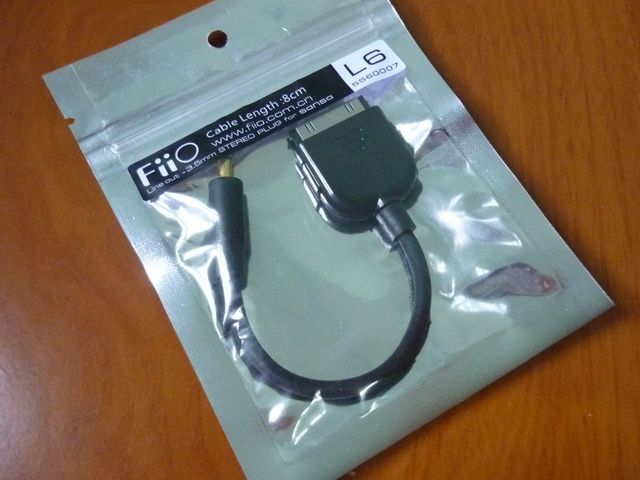
Well, I have had this little LOD for a few weeks now. I got mine from eBay for about US$20 with worldwide free shipping, which is a pretty good deal.
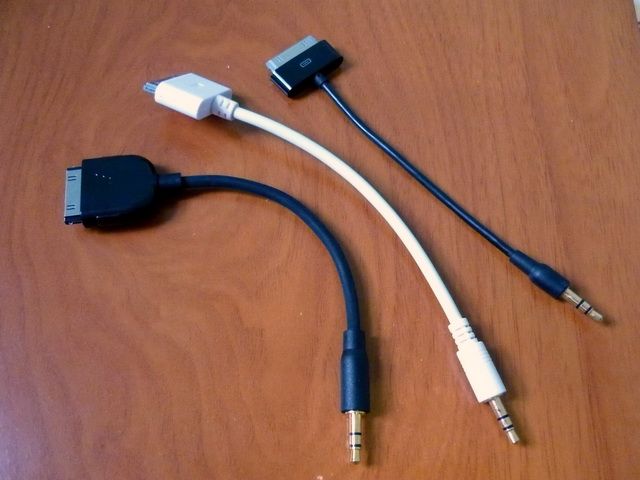
From left: FiiO L6, L3, L1.
Construction wise, it shares some similarity to the Oyaide HPC-D3.5 iPod LOD I have (= FiiO L3), except the dock itself is slightly bigger since it also needs to house a PCB with two coupling caps and jump the two pins needed to activate the line-out mode on Fuze.
One of the main difference between a Sansa Fuze line-out compare to other DAP’s line-out is that Sandisk doesn’t implement any coupling caps in the signal path. Output from the Fuze DAC does carry a certain DC voltage (about 1.4v), known as DC offset. While music signal are in AC form, the DC offset can still get amplified and send to the headphone. In minor cases, it just reduces the headphone performance; but in serious cases, the coil in the transducer can get out-of-alignment or even overheated and destroy (balanced armature is especially vulnerable). A coupling cap can filter out DC voltage, so there should be one in each channels. However, coupling caps can also affect sound quality, but we will leave it for later discussion.
The cable used on L6 is the same as one on L3. It is PCOCC-A cable from Oyaide, thicker than those on L1 but still fairly flexible. End-to-end the LOD is about 16.5mm or 6.5 inches. Overall the build quality is quite decent for its price.
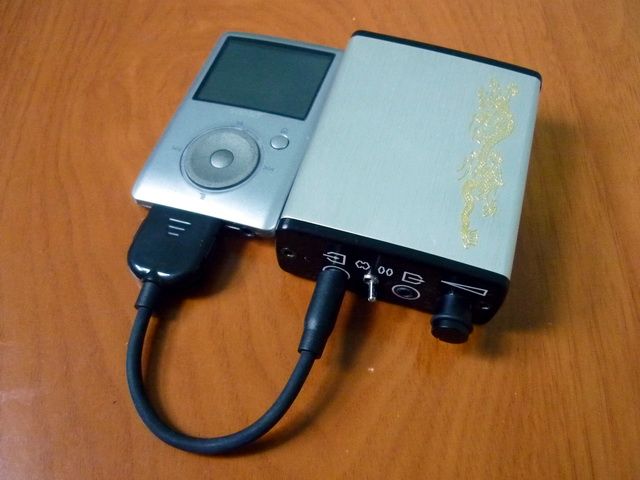
So some of you might hear that the Fuze’s SQ is actually quite good, which is in fact true. So why use a LOD + amp anyway? The idea has less to do with increasing the driving capability, since there are actually very few really hard-to-drive IEM in the market and Fuze is still capable of giving a very decent performance even when the IEM is a bit demanding. In any case, you can still amp the headphone-out since the signal is pretty clean. However, the actual goal is to squeeze out every single bit of SQ possible, even for the last 5% - to see how good it is going to get. Does it make any financial sense to double or triple the cost of a Fuze just to get the last 5%? Absolutely not, but I don’t get into this hobby so I can make sound financial decision. That being said, if you don’t really have a decent amp or fairly resolving headphone, then perhaps this will serve no more than an interesting read and as any responsible TV show will say: “Don’t try this at home.”
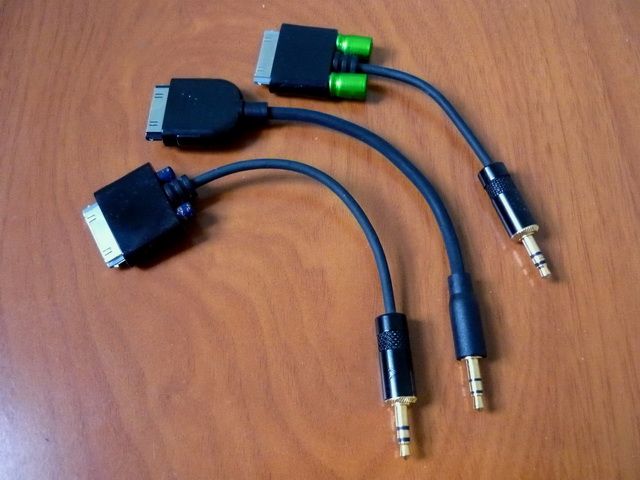
From left: diyLOD with Black Gate, L6, diyLOD with Nichicon ES.
How does FiiO L6 sound? In sum, “average”. By comparing headphone-out and L6, both feeding 3MOVE, the quality is comparable. Nothing is gained nor lost, at least I can’t tell much difference by A/B’ing them. Even if there is a difference, it is too subtle to say in absolute. I have made a few LOD for Fuze in the past and I know if you choose the wrong coupling caps, the sound can degrade even on the line-out. My personal favorite, the one that sounds best, is Nichicon MUSE, bi-polar ES series. I also tried the infamous Black Gate 22uF Hi-Q – Decent, but don’t find it quite as good as Nichicon on revealing detail, bass punch, or soundstage (not to mention that it is very expensive and hard to find). In fact, I even prefer the lesser sounding Nichicon VS series (also bi-polar) over the Black Gate just because it is a little more dynamic and exciting.
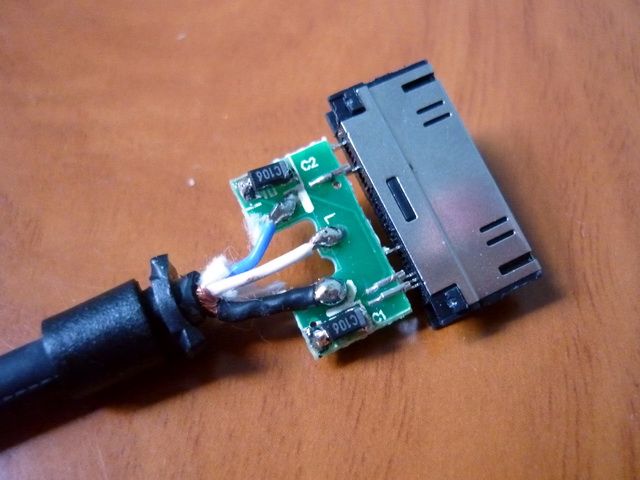
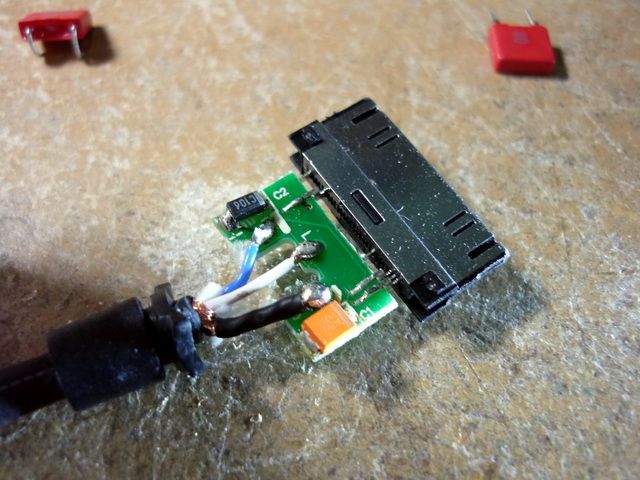
So what are the coupling caps in L6? That are SMD tantalum capacitors (10uF if I read it right), the kind that audiophiles want to avoid as much as possible in the signal path. Since L6 isn’t marketed as audiophile LOD (which can cost hundreds for a premier iPod LOD, last I checked) and due to size constrain, I guess it is reasonable to use tantalum caps. However, there are certainly ways to improve the SQ, in theory anyway.
The idea is to replace the default tantalum caps for something better. If you are willing to drill holes, even Nichicon can be used. Since I already have a few diyLOD for Fuze with caps sticking out on the back, I want to keep the external look as original as possible this time. So my plan is to replace the tantalum caps with niobium-oxide caps (OxiCap by AVX), which as I was told by another member who also experimented with different coupling caps that the niobium-oxide caps are pretty decent. Unfortunately the OxiCap I have (100uF) is too big to fit inside, so instead I have to order a few more that are compatible with the space on the PCB, including 10uF and 47uF variation. To make it more interesting, I also ordered some 0.068uF WIMA polyester film cap for bypassing the OxiCap. I would love to use bigger capacitance on the WIMA caps but anything bigger will not fit the inside of the dock. This also means using the WIMA alone will not give enough capacitance to lower the corner frequency. Thus the reason to use it for bypassing.
Here is a simple guide on what I have done:
AVX's OxiCap 10uF and 47uF, WIMA 0.068uF film cap.
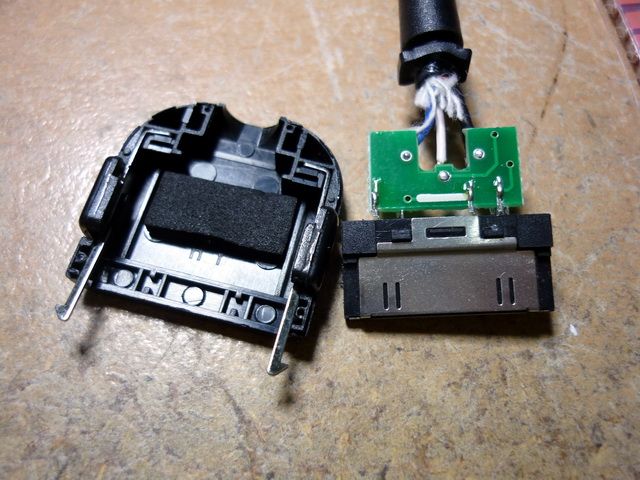
There is a foam pad underneath the PCB. Remove it only if you want to use WIMA cap for bypass.
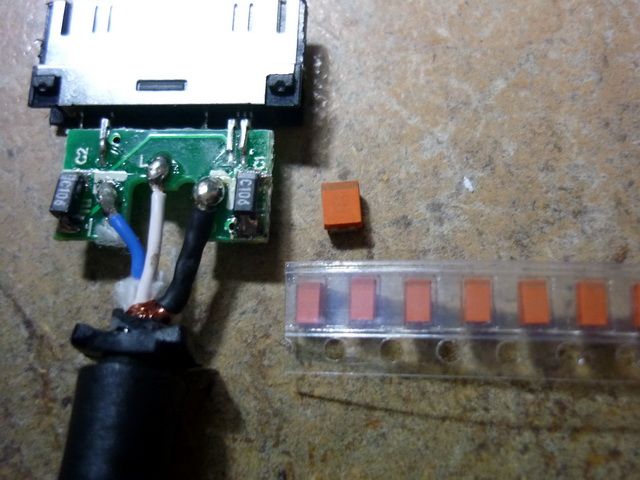
Size wise, 10uF OxiCap is a direct replacement. 47uF OxiCap is fatter, but same length.
I choose to use 47uF since I am planning to go all out. Bigger (capacitance) OxiCap won't fit in, so 47uF is the best choice size wise. NOTE: Make sure the polarity is correct!
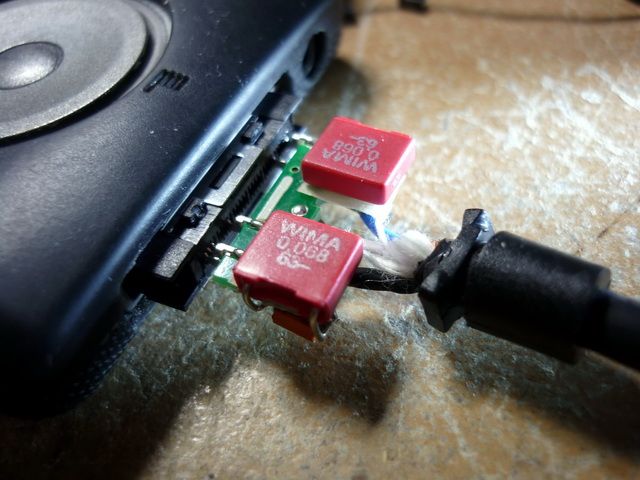
Bend the legs of the WIMA caps as shown. Also a good idea to put some masking tape between the PCB and WIMA cap. You don't have to worry about polarity on the WIMA.

One side finished.
Underneath.
Both sides are done.
Underneath.
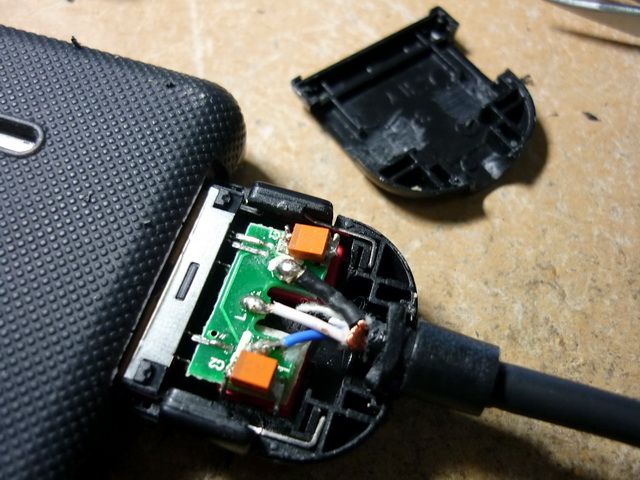
Since I choose to use both OxiCap and WIMA, I need to file down some plastic on the inside. If you use 10uF OxiCap, there won't need any mod on the case as long as you solder the cap in right position.
Glued back and finished.
From left: FiiO L6, L3, L1.
Construction wise, it shares some similarity to the Oyaide HPC-D3.5 iPod LOD I have (= FiiO L3), except the dock itself is slightly bigger since it also needs to house a PCB with two coupling caps and jump the two pins needed to activate the line-out mode on Fuze.
One of the main difference between a Sansa Fuze line-out compare to other DAP’s line-out is that Sandisk doesn’t implement any coupling caps in the signal path. Output from the Fuze DAC does carry a certain DC voltage (about 1.4v), known as DC offset. While music signal are in AC form, the DC offset can still get amplified and send to the headphone. In minor cases, it just reduces the headphone performance; but in serious cases, the coil in the transducer can get out-of-alignment or even overheated and destroy (balanced armature is especially vulnerable). A coupling cap can filter out DC voltage, so there should be one in each channels. However, coupling caps can also affect sound quality, but we will leave it for later discussion.
The cable used on L6 is the same as one on L3. It is PCOCC-A cable from Oyaide, thicker than those on L1 but still fairly flexible. End-to-end the LOD is about 16.5mm or 6.5 inches. Overall the build quality is quite decent for its price.
So some of you might hear that the Fuze’s SQ is actually quite good, which is in fact true. So why use a LOD + amp anyway? The idea has less to do with increasing the driving capability, since there are actually very few really hard-to-drive IEM in the market and Fuze is still capable of giving a very decent performance even when the IEM is a bit demanding. In any case, you can still amp the headphone-out since the signal is pretty clean. However, the actual goal is to squeeze out every single bit of SQ possible, even for the last 5% - to see how good it is going to get. Does it make any financial sense to double or triple the cost of a Fuze just to get the last 5%? Absolutely not, but I don’t get into this hobby so I can make sound financial decision. That being said, if you don’t really have a decent amp or fairly resolving headphone, then perhaps this will serve no more than an interesting read and as any responsible TV show will say: “Don’t try this at home.”
From left: diyLOD with Black Gate, L6, diyLOD with Nichicon ES.
How does FiiO L6 sound? In sum, “average”. By comparing headphone-out and L6, both feeding 3MOVE, the quality is comparable. Nothing is gained nor lost, at least I can’t tell much difference by A/B’ing them. Even if there is a difference, it is too subtle to say in absolute. I have made a few LOD for Fuze in the past and I know if you choose the wrong coupling caps, the sound can degrade even on the line-out. My personal favorite, the one that sounds best, is Nichicon MUSE, bi-polar ES series. I also tried the infamous Black Gate 22uF Hi-Q – Decent, but don’t find it quite as good as Nichicon on revealing detail, bass punch, or soundstage (not to mention that it is very expensive and hard to find). In fact, I even prefer the lesser sounding Nichicon VS series (also bi-polar) over the Black Gate just because it is a little more dynamic and exciting.
So what are the coupling caps in L6? That are SMD tantalum capacitors (10uF if I read it right), the kind that audiophiles want to avoid as much as possible in the signal path. Since L6 isn’t marketed as audiophile LOD (which can cost hundreds for a premier iPod LOD, last I checked) and due to size constrain, I guess it is reasonable to use tantalum caps. However, there are certainly ways to improve the SQ, in theory anyway.
The idea is to replace the default tantalum caps for something better. If you are willing to drill holes, even Nichicon can be used. Since I already have a few diyLOD for Fuze with caps sticking out on the back, I want to keep the external look as original as possible this time. So my plan is to replace the tantalum caps with niobium-oxide caps (OxiCap by AVX), which as I was told by another member who also experimented with different coupling caps that the niobium-oxide caps are pretty decent. Unfortunately the OxiCap I have (100uF) is too big to fit inside, so instead I have to order a few more that are compatible with the space on the PCB, including 10uF and 47uF variation. To make it more interesting, I also ordered some 0.068uF WIMA polyester film cap for bypassing the OxiCap. I would love to use bigger capacitance on the WIMA caps but anything bigger will not fit the inside of the dock. This also means using the WIMA alone will not give enough capacitance to lower the corner frequency. Thus the reason to use it for bypassing.
Here is a simple guide on what I have done:
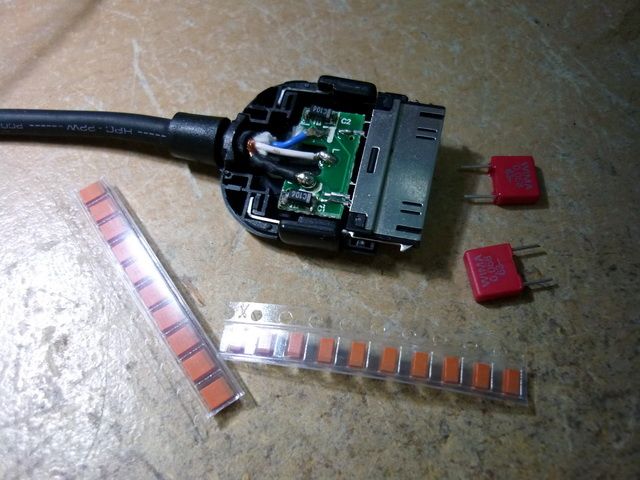
AVX's OxiCap 10uF and 47uF, WIMA 0.068uF film cap.
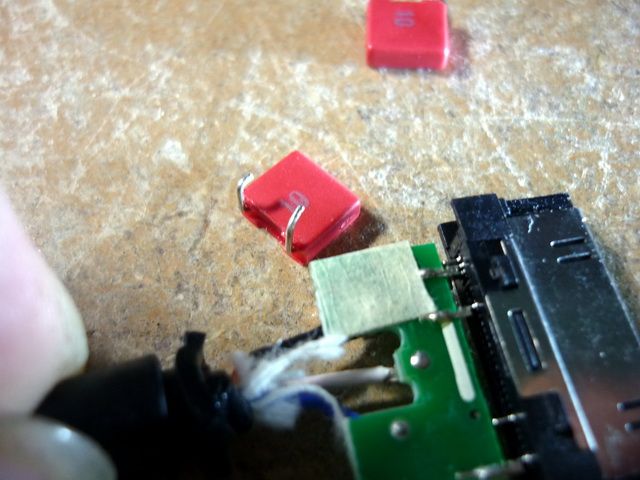
There is a foam pad underneath the PCB. Remove it only if you want to use WIMA cap for bypass.
Size wise, 10uF OxiCap is a direct replacement. 47uF OxiCap is fatter, but same length.
I choose to use 47uF since I am planning to go all out. Bigger (capacitance) OxiCap won't fit in, so 47uF is the best choice size wise. NOTE: Make sure the polarity is correct!
Bend the legs of the WIMA caps as shown. Also a good idea to put some masking tape between the PCB and WIMA cap. You don't have to worry about polarity on the WIMA.
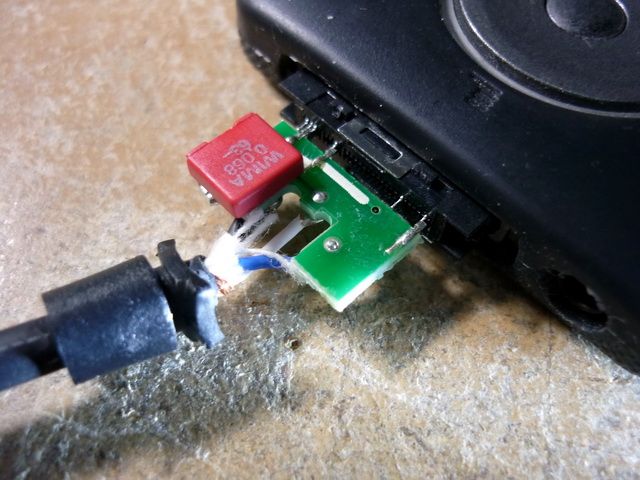
One side finished.
Underneath.
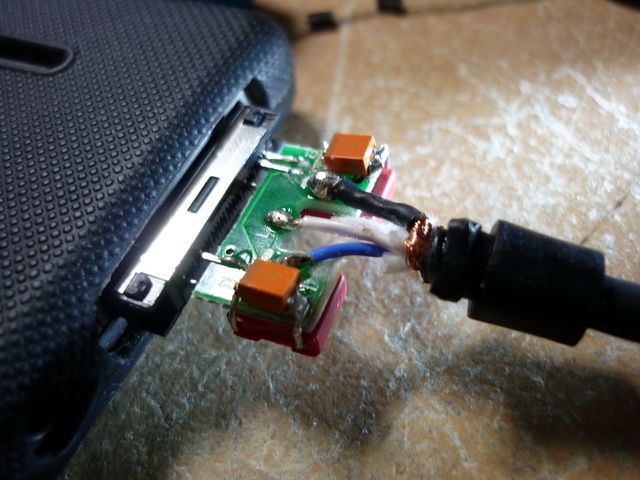
Both sides are done.
Underneath.
Since I choose to use both OxiCap and WIMA, I need to file down some plastic on the inside. If you use 10uF OxiCap, there won't need any mod on the case as long as you solder the cap in right position.
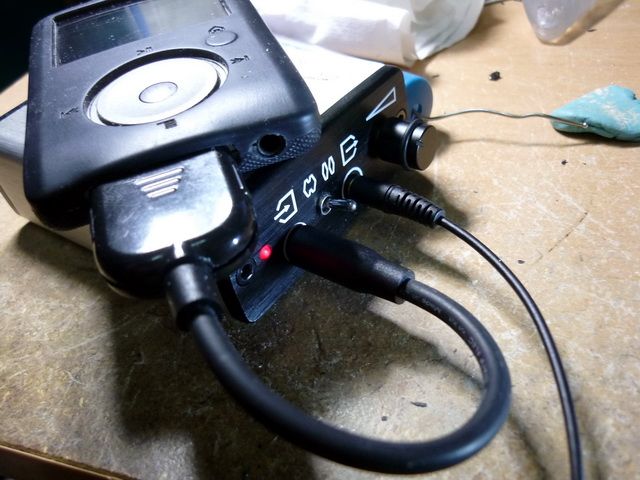
Glued back and finished.
I did a quick A/B when one side is finished with the OxiCap, then another quick A/B when the WIMA cap is in. Basically, the SQ improvement from tantalum cap to OxiCap is pretty obvious. It becomes less mid focus, better extended to both end, great bass response, more detail and better in soundstage. Adding the WIMA cap improves the top end a little bit, making it more crisp and a little more airy, but nothing major. If you don't feel like adding the WIMA, I think the OxiCap alone should be more than enough.
After the mod is completed, I A/B'ed the new L6 against phone-out and the two diyLOD with Nochicon caps and Black Gate (via 3MOVE + HifiMan RE0 and Radius DDM). Overall the sound signature is closest to Black Gate, but improves upon it. As mentioned before, the new L6 is less mid focus and more extended on both ends compared to the original tantalum caps. Since the tantalum caps sound very close to the phone-out, the finding is also true when compared the new L6 to the phone-out.
Between the two diyLOD, Nichicon is airy, more analytical, dynamic and spacious, while Black Gate is warmer, darker, almost phone-out like but with better extension on both ends and a little more detail. The new L6 is closer to Black Gate as it is also a warm sound. While the treble is a little bit better on the new L6, the major difference between it and the Black Gate is on the bass body and especially on texture. Suddenly I hear bass texture that I have never heard on phone-out, Nichicon or Black Gate. It is like finding new note in the same music I have heard for many times. In that sense the new L6 is definitely more resolving than the other LOD I have. Compared to Nichicon, the new L6 is just a tad more aggressive on the upper mid / lower treble, however the only real downside I can detect is that the soundstage on the new L6 is not quite as wide as the Nichicon. Overall I'll say it is a tie between the two, with Nichicon wins on the treble and soundstage and OxiCap + WIMA win on the mid and bass.
As I have mentioned before, we are talking about the last 5% here, so please take everything with a grain of salt.


